

Author: Tosh Lubek Published: 28th April 2021
KitchenAcorns.com is supported by its readers. Please assume links on this site are affiliate links or ads, and that I get commissions for purchases made through these links. As an Amazon Associate, I earn from qualifying purchases. Thank you if you use any of the links.
If you’re wondering whether you can make waffles without a waffle iron, you aren’t alone. Waffle irons are a slightly frustrating piece of equipment to have in the kitchen – they’re bulky, and while there are lots of other inventive uses for them, they are a little bit of a one-trick-pony.
The great news is that yes, you can make waffles without a waffle iron. I admit, they aren’t going to be exactly the same as regular waffles, certainly in terms of their shape, but you can still really enjoy some great waffles even if you don’t have a dedicated waffle iron.
We’re going to explore some of the potential ways to make waffles without the iron.
These include oven baking with a silicone waffle mold. Using a ridged grill pan on the stovetop. Pouring waffle mix into a sandwich maker. Making pancake-like waffles in a skillet. Simulate a waffle shape by piping batter onto a hot skillet. Drizzle waffle mix from a funnel onto a skillet. And using a Yorkshire Pudding tin to oven bake mock waffles.
You might want to try out a variety of these methods to see what works best for you. The wonderful thing is, whichever method you try, it’s going to be tasty!
Method One: Oven Bake in a Silicone Waffle Mold
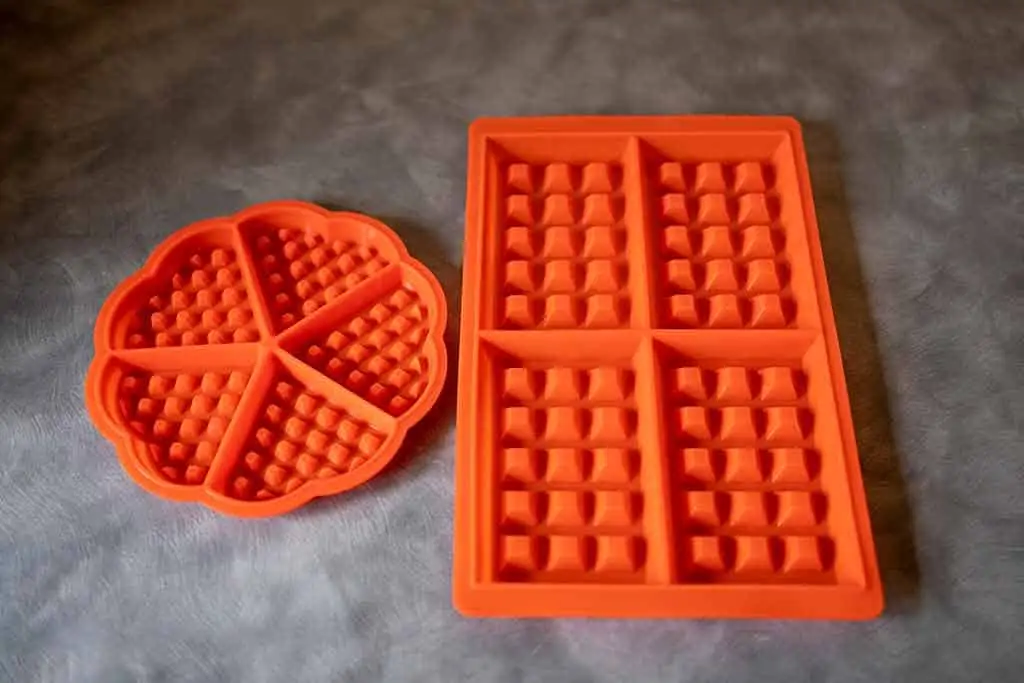
Baking your waffles in the oven is one possibility, and to do this, you will want a silicone mold to pour the waffle batter into. You can get a whole range of different shapes and sizes of silicone molds, including ones shaped like actual waffles – both round and square.
Most silicone waffle molds will come with little spikes to shape the batter and help you achieve that crispy shell. It’s important to use a mold that has been designed with waffles in mind; you don’t want a flat tin that will just result in a square of waffle batter, as it likely won’t cook properly and will certainly not have such a good texture.
A silicone mold will work much better than a metal one; you can tip the waffles out, and they shouldn’t stick even if you don’t use a lot of grease. If they do stick, they will be easy to pop free.
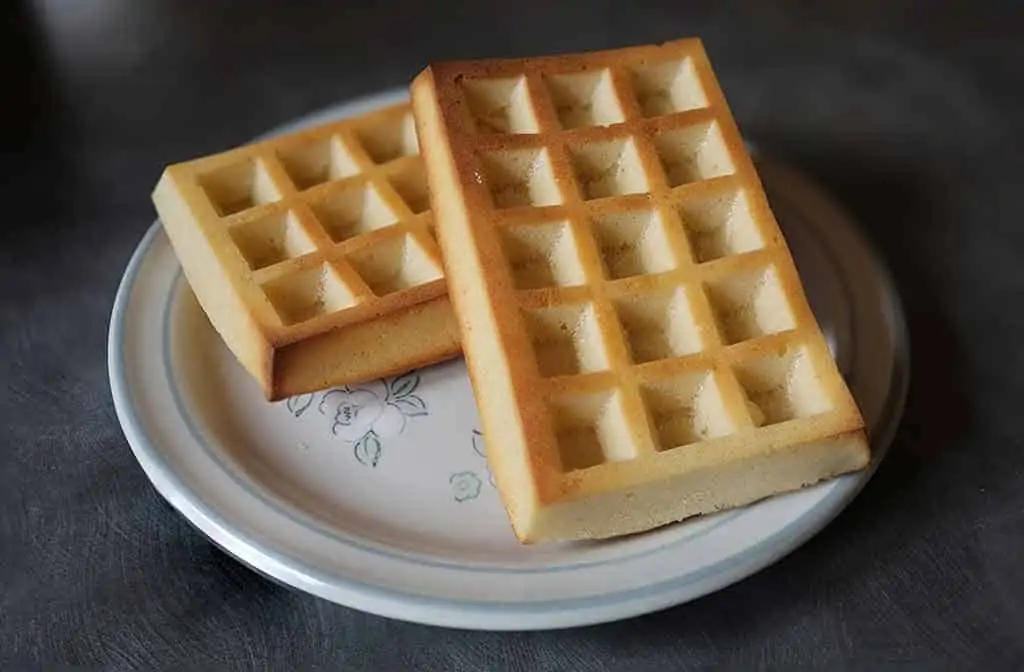
The important part of making waffles in the oven is to get the oven really hot before you put the batter in – a waffle maker would be hot, so you want to mimic this as closely as possible by making sure your oven has preheated to 350°F (190°C) before you put the waffles in. Bake for 12 to 15min until the top is golden. I’ve made heart and rectangular-shaped waffles and found 15mins to be my preferred cooking time for waffles that were a golden brown color.
One of the wonderful things about this method is that if you have several molds, you can make a whole batch of waffles all at once, so there’s no need to try and keep some hot while others are cooking.
COOKING TIP: Place the silicone molds on a baking tray before pouring in the waffle batter and then place the tray, with the filled molds, in the oven.
Method Two: Make waffles in a Ridged Grill Pan
You can also cook waffles in a pan with ridges to mimic the ridges in a waffle maker. This will encourage the batter to spread and puff and will help you to reflect the waffle shape at least to some degree.
Grease your pan thoroughly so that the waffles won’t stick. You can use butter, oil, or spray oil to get a good coating, but don’t omit this step, even if you’re using a non-stick pan.
You again want your pan really hot before you add the batter, as this will give you a good “sear” on the outside of the waffles. Turn down the heat a little while they cook, and then turn it back up to “sear” the other side when you flip them.
Flipping waffles in a ridged pan can be difficult, but it doesn’t matter too much if the waffle breaks when you flip it. Just turn the broken pieces and let them cook as normal. They’ll still taste great.
It may be easier to make small waffles when you’re cooking them in a ridged pan. This can make it easier to turn them over, and also prevents you from ending up with too much batter; the waffles will just spread.
However, if you would rather make one great big waffle, which should work too – just make sure you have a spatula that will slip under it and support its weight as you turn it over, and don’t add more batter than the pan can cook properly.
When you flip the waffles, press lightly on the top with the spatula to ensure good contact between the waffle and the ridges. It’s a good idea to try and line the same bits of your waffle up with the ridges on both sides, but this is more for the aesthetics than anything else.
Method Three: Use a Sandwich Maker as a waffle iron
What about waffles in a sandwich maker? There are many similarities between sandwich makers and waffle irons, so if you have a sandwich maker but not a waffle iron, you’re in luck – because you can make waffles absolutely fine in a sandwich maker. They just won’t be the same shape!
You may find that you need more mixture overall to properly fill the sandwich shapes, but you will end up with bigger waffles as a result. They should be delicious, very crispy on the outside, and puffy on the inside.
As with each method, make sure the sandwich maker is nice and hot before you add the batter, and don’t forget to grease it a bit so that the waffles don’t stick – they won’t be as easy to get out as a sandwich, and you don’t want a mess of batter stuck all over the sandwich maker.
Method Four: Make Pancake looking Waffles in a Skillet

What if you don’t have any of those things and you still really want waffles? Well, you probably do have a skillet you can use, and you can cook waffles using just a flat skillet, amazingly.
You may want to slightly increase the sugar in the mix to help the batter crisp up properly, as this will not have quite the same advantages as cooking in a shaped mold or a ridged pan. Your waffles will come out flat and may not have such a good balance of crunchy and soft. However, the top and bottom will initially be crispy, but the skillet waffles will become a bit floppy, just like pancakes, if you plan to save them until later.
You may also find that syrup and other toppings slide off, because you don’t have the “pockets” for them to pool in, but you will still be able to enjoy crisp waffles, even using just a flat skillet.
It’s a good idea not to make skillet waffles too thick; because they don’t have pockets, the batter will take a bit longer to cook in the middle. Flipping them will help, but it’s still better to aim for waffles that are closer to pancakes in terms of their thickness. Make sure they are cooked through before you serve them.
Method Five: Use a Piping-Bag to criss-cross waffle mix onto a Skillet

If you have a piping bag, you can overcome some of the issues that you face when cooking in a flat skillet. You can make those pockets and crispy edges, achieving something that is much more like a waffle in shape and possibly in texture.
Fill your piping bag with waffle mixture, and then crisscross the batter into your hot skillet. You will find that it spreads a little as it cooks, creating those lovely “pockets” to fill with syrupy goodness.
You may end up with the odd hole and your crisscrosses will probably be somewhat wonky compared with a proper waffle maker, but this won’t affect the flavor or waffle experience at all! As a bonus, your kids will probably love the look, especially if you allow them to help with the piping bag. Embrace the rustic look and enjoy your waffles.
Method Six: Drizzle waffle mix from a funnel onto a Hot Skillet
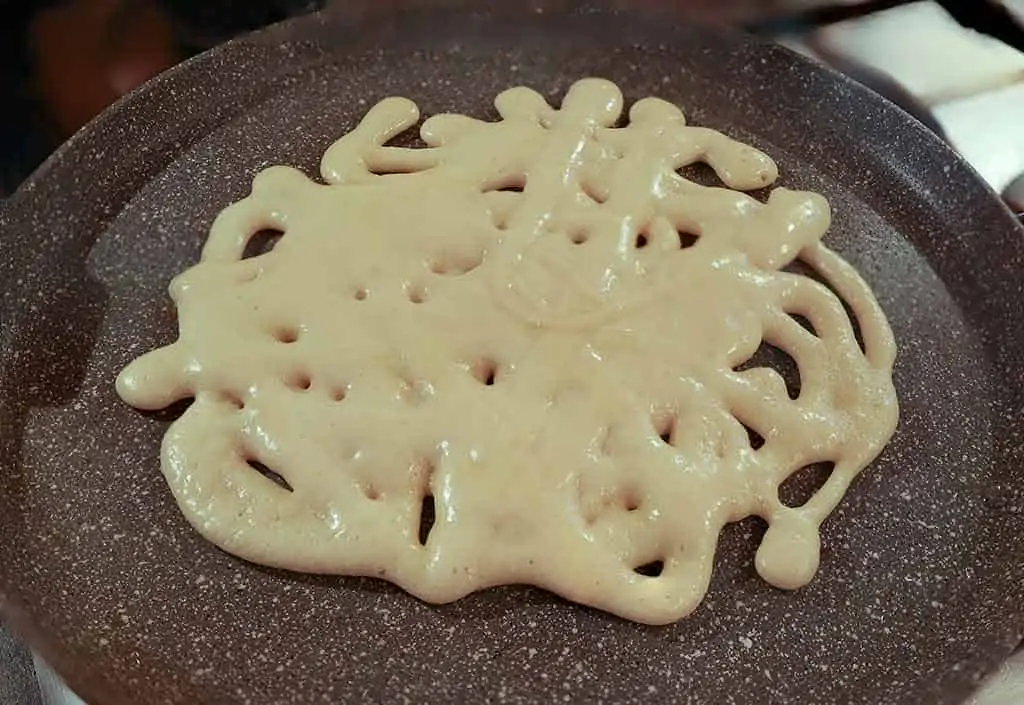
If you don’t have a piping bag but you do have a funnel, the great news is that you can make a funnel cake version of waffles very easily – and have a lot of fun creating waves and wiggles out of your waffle batter.
You can even draw shapes and impress your guests, but don’t get so carried away that you compromise on waffle quality.
To make waffles in a skillet using a funnel, you’re going to grease and heat your skillet as in the other methods, and then grab a funnel. Set a clean, spare bowl ready to put the funnel in if/when you need to put it down (to avoid making a mess on the counters or accidentally dripping batter everywhere).
Wash your hands thoroughly, and then use your finger or thumb on your non-dominant hand to plug the bottom of the funnel. Next, half-fill the funnel with batter. Move the funnel over the hot pan, and let the batter drip through, snaking it around the pan.
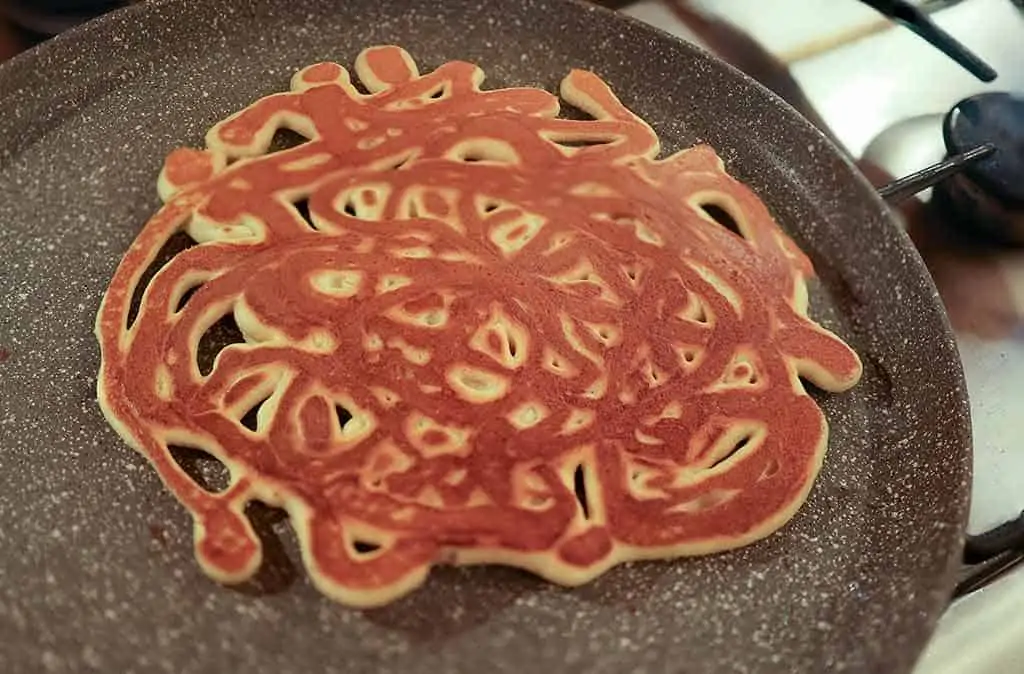
This method will create plenty of pockets and dips, just like in a traditional waffle – but in much less uniform ways. You can make the waffle as big as you like, and then cut it up to serve it, or make lots of little waffles.
Let the batter sear, crisp, and puff up a bit before flipping it to cook the other side.
You may find that your waffle ends up flatter on the bottom than the top, so when you’ve flipped it, use the spatula to press it gently against the pan, making sure it is getting good contact with the hot surface so it will crisp up thoroughly.
Method Seven: Use a Yorkshire pudding tin to oven bake waffles
This method produces round waffles that look a little like flattish disk-shaped muffins. Despite the shape, they still taste pretty good. You can make waffles in the oven with a standard waffle mix and a Yorkshire Pudding baking tin. Here are the steps:
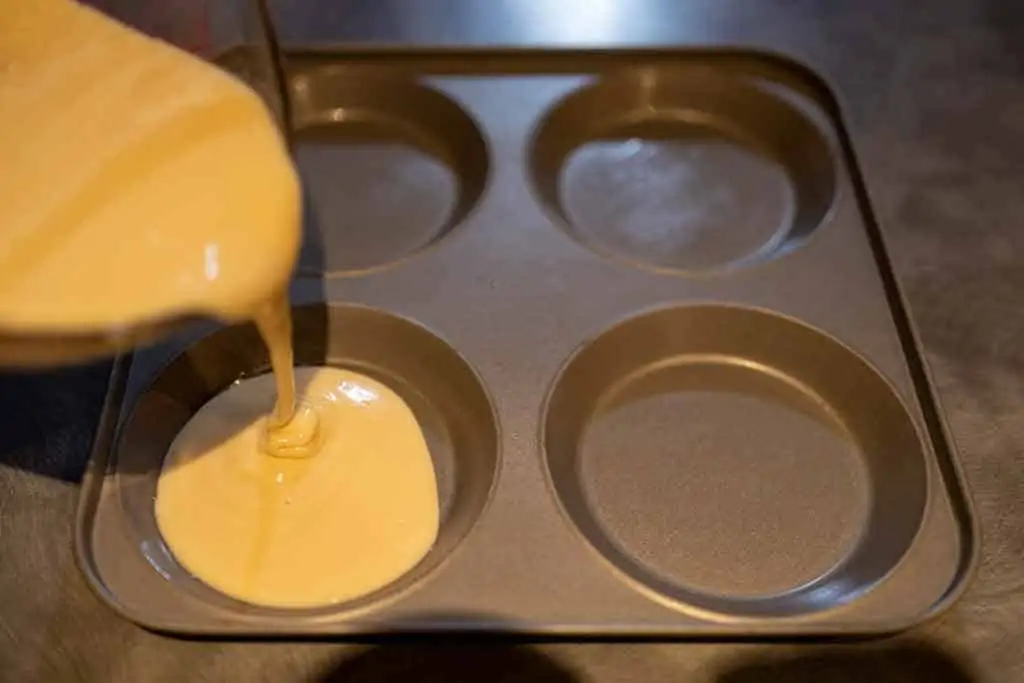
- Preheat your oven to 350°F (190°C).
- Grease the Yorkshire Pudding tin with a little oil or butter.
- Pour your waffle mix into the greased Yorkshire Pudding baking tin.
- Place the Yorkshire Pudding tin in the middle of the preheated oven for 10 minutes or until golden brown.
- The finished “waffles” will be 4-inch-wide circles of fluffy goodness that have risen slightly in the center.
- Turn out the circular “waffles”, add your favorite topping, and enjoy!
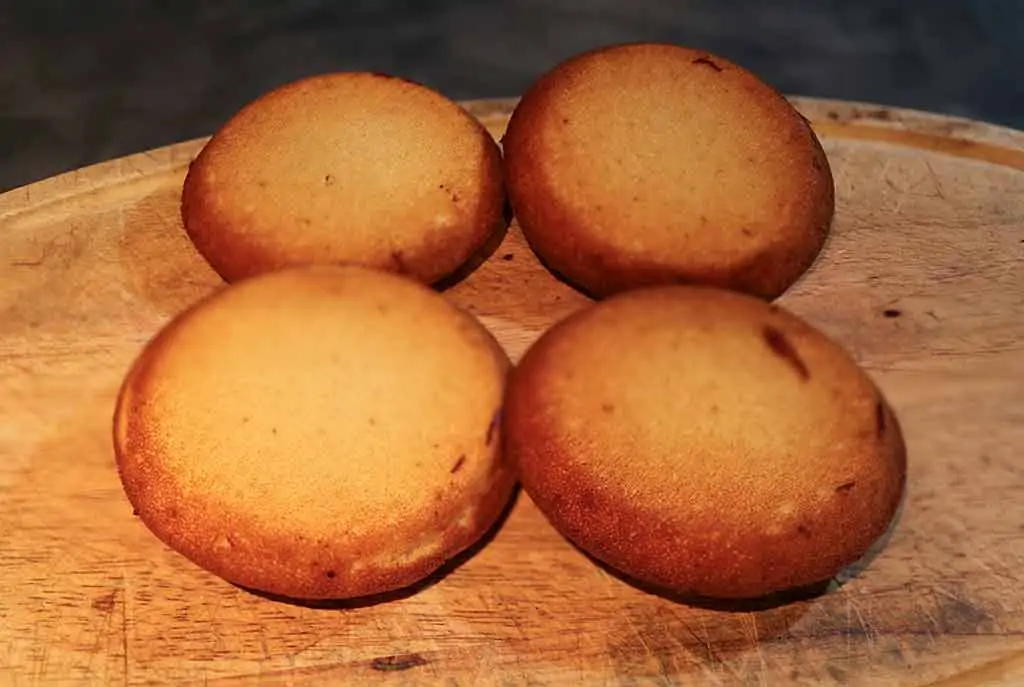
The circular waffles look like mini sponge cakes rather than regular waffles, but they taste good. What is missing from these mock waffles are the pockets that would normally hold syrup and butter.
Even so, because the waffle mix is against a hot metal surface, the base can become slightly crispy. The metal tin also provides an opportunity to try making crispy oven-baked Belgian-style Liege Waffles!
These are made with yeast dough and include pearl sugar, which can become caramelized where it touches the metal tin. If you enjoy Liege-style waffle but find cleaning the caramelized sugar deposits off your waffle iron’s grid plates awkward and time-consuming, try using this oven-baked alternative. The post-cooking clean-up is much easier.
Conclusion
If you don’t have a waffle iron, never fear, there are many other simple methods for getting your waffle hit and satisfying your cravings – and you may find you actually prefer the results!
Waffles that aren’t made in a dedicated iron will probably not be as neat or look as picture-perfect, but they can be just as delicious.
Experiment with the different methods and find the one that works best for you, resulting in crispy, steamy waffles every time you cook them.
Sources: 1, 2, 3, 4, 5, 6, 7, 8
Tosh learned how to cook while watching his Polish Mom at home. He also worked in a family-owned restaurant while a student and learned much from the chefs. Cooking has always interested him, especially the hearty Polish recipes he learned from his mother. He has helped create and appeared on cookery shows on radio stations in Scotland.
Recent Posts
This family pancake recipe will make about thirty-six pancakes that have a thickness of about 3/8th to half an inch and a diameter of about 4 inches. In my family, I would often prepare a batch of...
If you want to know a lot more about waffles but don’t have the time to read through loads of articles, you’re in the right place. I’ve collected together 25 of the most often asked...